
Last updated September 25, 2026
Free written scope consultation - allowances, timeline, and change-order rules on paper before a single trade is scheduled







 Before
 After
After Before
 After
After Before
 After
AfterKitchen Remodeling Maintenance Checklist for Redwood City Homeowners
Most kitchen remodels in Redwood City look flawless at walk-through. Sixteen months later, the same projects show grout cracks along the cooktop backsplash, cabinet doors that no longer self-close, and a slow leak staining the sink-base particleboard. These are not material defects. They are maintenance failures. In our experience across 4,000-plus projects, the contractors who hand over a written maintenance protocol at closeout receive fewer than half the callback requests of those who don’t. Yet fewer than one in ten Redwood City homeowners receives such a document. This guide is that missing protocol: a month-by-month inspection schedule, material-specific care instructions, and documentation practices that protect your investment through the critical first 24 months.
Quick Answer
A proper kitchen remodel maintenance protocol for Redwood City homeowners includes monthly inspections of caulk joints and under-sink plumbing for the first year, quarterly hinge and drawer-slide adjustments, material-specific countertop care (no acidic cleaners on quartz, no sealing on laminate), and annual documentation updates of shut-off valve locations and appliance serial numbers. For additional context, see our Seasonal Construction Care for Redwood City: Year-Round Homeowner’s Guide. The marine climate in Redwood City accelerates wood movement and caulk fatigue compared to inland Bay Area builds, making the 90-day inspection particularly critical.
Table of Contents

- Month-by-Month Inspection Schedule: Year One
- Cabinet Care in Redwood City’s Marine Climate
- Countertop-Specific Care by Material
- Plumbing and Electrical Systems
- Appliance Integration and Ventilation
- Documenting Your As-Built Remodel
- Homeowner-Voided Warranty Triggers vs. DIY-Safe Tasks
- Common Mistakes to Avoid
- When to Call a Professional
- Frequently Asked Questions
 Before
 After
AfterMonth-by-Month Inspection Schedule: Year One
The first year after a kitchen remodel is when materials settle, adhesives cure completely, and installation stresses reveal themselves. For a broader overview of local building considerations, see The Complete Guide to Construction in Redwood City. Redwood City’s climate - cool, humid mornings giving way to dry afternoon sun, with salt air influence from the Bay - creates more thermal and moisture cycling than homeowners in San Jose or Walnut Creek experience. Wood moves more. Caulk fatigues faster. This schedule catches problems before they become water damage.
30-Day Inspection
Schedule this for a quiet morning when you can run water and open cabinets without distraction. Bring a flashlight, a notepad, and your phone for photographs.
- Under-sink supply connections: Run hot water for two minutes, then cold for two minutes. Dry the cabinet base completely with a towel, then wait ten minutes. Any new moisture indicates a compression fitting that has seated incompletely or a supply line with a manufacturing defect. Check both the faucet supply lines and the dishwasher stub-out - the 3/8-inch compression fitting on the dishwasher branch is the most common leak point we document in Redwood City kitchens.
- Toe-kick gaps: Kneel and sight along the base of each cabinet run. The toe-kick (the recessed panel at floor level) should sit flush with no visible gap to the flooring. Seasonal humidity in Redwood City can cause the flooring to expand against the toe-kick, creating pressure that pops it outward or cracks the scribe joint. Note any gaps exceeding 1/16 inch.
- Caulk joints at backsplash and countertop: The silicone or latex caulk between countertop and backsplash, and between sink rim and countertop, should be continuous with no voids or shrinkage cracks. Run a fingernail lightly along the bead; any section that crumbles or separates was applied over a damp substrate and needs replacement.
- Cabinet door alignment: Close all doors slowly. Blum and Grass hinges, the brands we specify for Redwood City projects, have integrated soft-close mechanisms that should engage in the last 15 degrees of swing. If a door slams or bounces, the hinge cup has shifted slightly in the bored hole - normal after the first month of use as the wood acclimates.
90-Day Inspection
This is the critical inspection. By 90 days, the cabinet boxes have completed their initial acclimation to your home’s humidity range, and any installation stresses have worked themselves visible.
- Repeat all 30-day checks. Leaks that were microscopic at 30 days may have become detectable. Caulk shrinkage often appears between days 45 and 75 as solvents fully evaporate.
- Hinge adjustment: Blum Clip-Top hinges have three adjustment screws: depth (front-to-back), side-to-side, and vertical. Use a Phillips head to correct any door that has drifted out of plane with its neighbor. In Redwood City’s climate, we typically see 1/32 to 1/16 inch of vertical drift on upper cabinets over exterior walls - the morning fog swells the hinge-side stile slightly. The vertical adjustment screw corrects this in 30 seconds.
- Drawer slide function: Fully extend each drawer. Blum Tandem slides should move with consistent resistance; any catching or rattling indicates a slide bracket that has loosened. Check the rear bracket screws, which take the load when drawers are fully loaded.
- Grout inspection at cooktop and sink: The backsplash grout behind the cooktop and beside the sink endures the most thermal and moisture stress. Any hairline cracks here are normal; cracks wider than 1/32 inch, or any powdering grout, indicate a mix that was too wet at application or a substrate that moved after cure.
180-Day Inspection
By six months, your usage patterns are established. This inspection focuses on wear items.
- Countertop seam check: If your countertop has a seam (common on L-shaped layouts or island runs over 120 inches), examine it with raking light from a flashlight held parallel to the surface. Any change in seam flushness indicates substrate movement or adhesive failure.
- Range hood filter: Remove and degrease. A clogged filter reduces capture efficiency and forces the motor to work harder, shortening bearing life.
- Garbage disposal flange: The sink flange seal should show no weeping. Tighten the three mounting screws equally if there is any movement.
- GFCI test: Press the test button on each GFCI outlet; it should trip and reset. Redwood City’s occasional power fluctuations from Peninsula storms can stress GFCI electronics.
12-Month Inspection
Annual maintenance transitions from inspection to preventive care.
- Recaulk the sink rim and backsplash if needed. Silicone caulk in a kitchen environment has a functional life of 12-18 months.
- Deep-clean and re-oil wood cabinet interiors if specified by the manufacturer; most modern conversion varnish finishes need no treatment.
- Update your documentation file (see the Documentation section below) with any appliance service records.
Cabinet Care in Redwood City’s Marine Climate
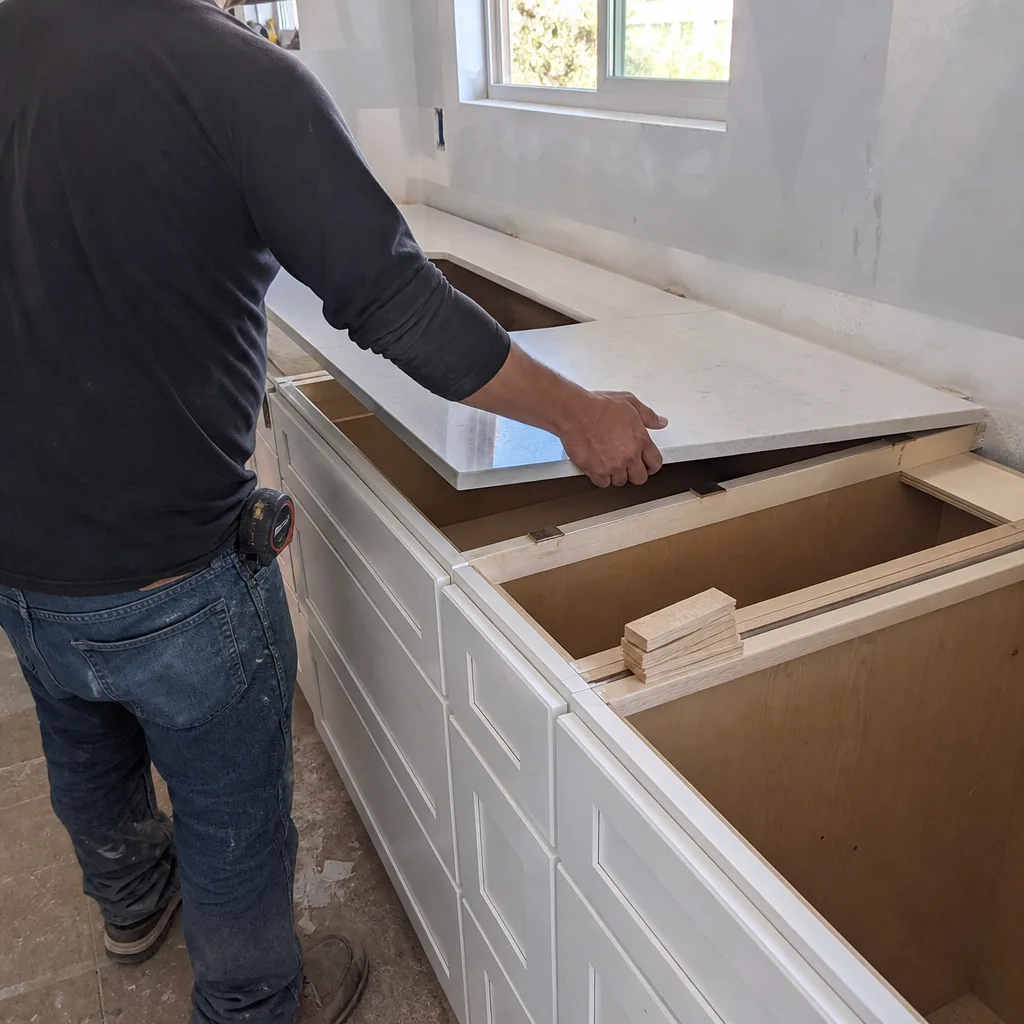
Redwood City sits at the northern edge of Silicon Valley, but its climate owes more to San Francisco Bay than to the Santa Clara Valley. Morning marine layer fog is common ten months of the year, and afternoon relative humidity can swing from 85% at 7 AM to 45% by 3 PM. That 40-point swing, repeated daily, moves wood more than the steady dry heat of a Sacramento summer.
We’ve measured cabinet door gaps in Redwood City homes that shifted 3/32 inch between August and January - enough to change soft-close function and create visible misalignment in flush-overlay designs. The solution is not better wood; it’s adjustable hardware and an owner who knows how to use it.
Hinge brands and field adjustment: The two brands we specify, Blum and Grass, both offer three-axis adjustment on their concealed cup hinges. Blum’s Clip-Top series uses a cross-head screw for side-to-side, a slotted screw for depth, and a Phillips screw for vertical. Grass’s Nexis series uses a similar layout with Torx heads. Both are designed for homeowner adjustment without disassembly. The key is adjusting in small increments - quarter-turns - and checking adjacent doors for cumulative effects.
Drawer slides: Blum Tandem plus Blumotion slides integrate the soft-close damper into the slide body. If a drawer loses its soft-close, the cause is usually overloading (the damper is hydraulic and can be forced past its design stroke) or debris in the slide raceway. Remove the drawer, clean with a dry cloth, and check that the plastic trigger tab at the slide front is not cracked.
Box construction and humidity: Most cabinet boxes in Redwood City kitchens are 3/4-inch plywood or furniture-grade particleboard with thermofused melamine interiors. Both materials are dimensionally stable, but the face frame (on framed cabinets) or the door mounting plate (on frameless European-style boxes) is solid wood or MDF. This is where movement shows. A frameless cabinet with a wood door mounting plate may develop a slight reveal change at the hinge side; this is why we prefer metal-reinforced mounting plates for Redwood City installations.
Ventilation: Run the range hood during cooking and for ten minutes after. Cooking generates moisture; the marine layer adds more. A kitchen that runs 60% relative humidity or higher for extended periods will eventually stress any cabinet material.
Countertop-Specific Care by Material
The cleaning product category that voids most manufacturer warranties is also the one most homeowners reach for first: acidic cleaners. Vinegar, lemon juice, and most “natural” cleaners with citrus oils etch or degrade every common kitchen countertop material except stainless steel. Here’s the specific care protocol by material, based on manufacturer documentation from the brands we quote.
Quartz: Caesarstone and Cambria
Engineered quartz is 93-95% ground quartz aggregate bound with polyester resin. The resin is the vulnerable component.
- Clean with: pH-neutral dish soap and water, or a dedicated quartz cleaner like Weiman or Granite Gold. Caesarstone’s care guide explicitly warns against Windex, Formula 409, and any cleaner with bleach or ammonia.
- Avoid: Heat above 300°F directly from cookware - the resin can discolor or crack from thermal shock. Trivets are mandatory, not optional.
- Redwood City specific: The UV exposure through south- and west-facing windows in Redwood City neighborhoods like Mount Carmel and Farm Hills can, over years, cause slight yellowing in light-colored quartz. This is documented in Cambria’s technical literature. Closing blinds during peak afternoon hours prevents it.
- Never use: Abrasive pads (Scotch-Brite, steel wool) - they micro-scratch the resin surface, creating dull areas that collect stains.
Natural Stone: Calacatta, Carrara, and Other Marbles
Marble is calcium carbonate. Anything acidic dissolves it. The etch mark from a lemon wedge left for thirty minutes is permanent and requires professional refinishing.
- Seal: Every 6-12 months with a penetrating sealer like Miracle Sealants 511 or StoneTech Bulletproof. Test by sprinkling water; if it darkens the stone in under ten minutes, reseal.
- Clean with: pH-neutral stone cleaner only. Even “mild” dish soap can build up and dull the surface over time.
- Accept: Patina. A kitchen marble countertop in active use will develop etches and stains. Some owners embrace this; others choose quartz for precisely this reason. We document this choice in writing before fabrication.
Laminate: Wilsonart and Similar Brands
Thermally fused laminate (TFL) or high-pressure laminate (HPL) is the most forgiving material and the most abused.
- Clean with: Any non-abrasive cleaner. The wear layer is aluminum oxide or melamine resin; it resists almost everything except heat and abrasion.
- Avoid: Standing water at seams and edges. The particleboard substrate swells irreversibly when wet. Wipe spills promptly, especially at the sink cutout where the edge is exposed.
- Never use: Steel wool or abrasive powders. They scratch the wear layer, and laminate cannot be refinished.
| Material | Safe Cleaner | Warranty-Voiding Product | Key Maintenance Task |
|---|---|---|---|
| Quartz (Caesarstone, Cambria) | pH-neutral dish soap, Weiman Quartz Cleaner | Vinegar, Windex, bleach, ammonia | Trivets for hot cookware; no abrasive pads |
| Marble (Calacatta, Carrara) | pH-neutral stone cleaner | Any acidic cleaner, lemon, vinegar | Reseal every 6-12 months |
| Laminate (Wilsonart) | Any non-abrasive cleaner | Abrasive powders, steel wool | Keep edges dry; wipe spills immediately |
Plumbing and Electrical Systems
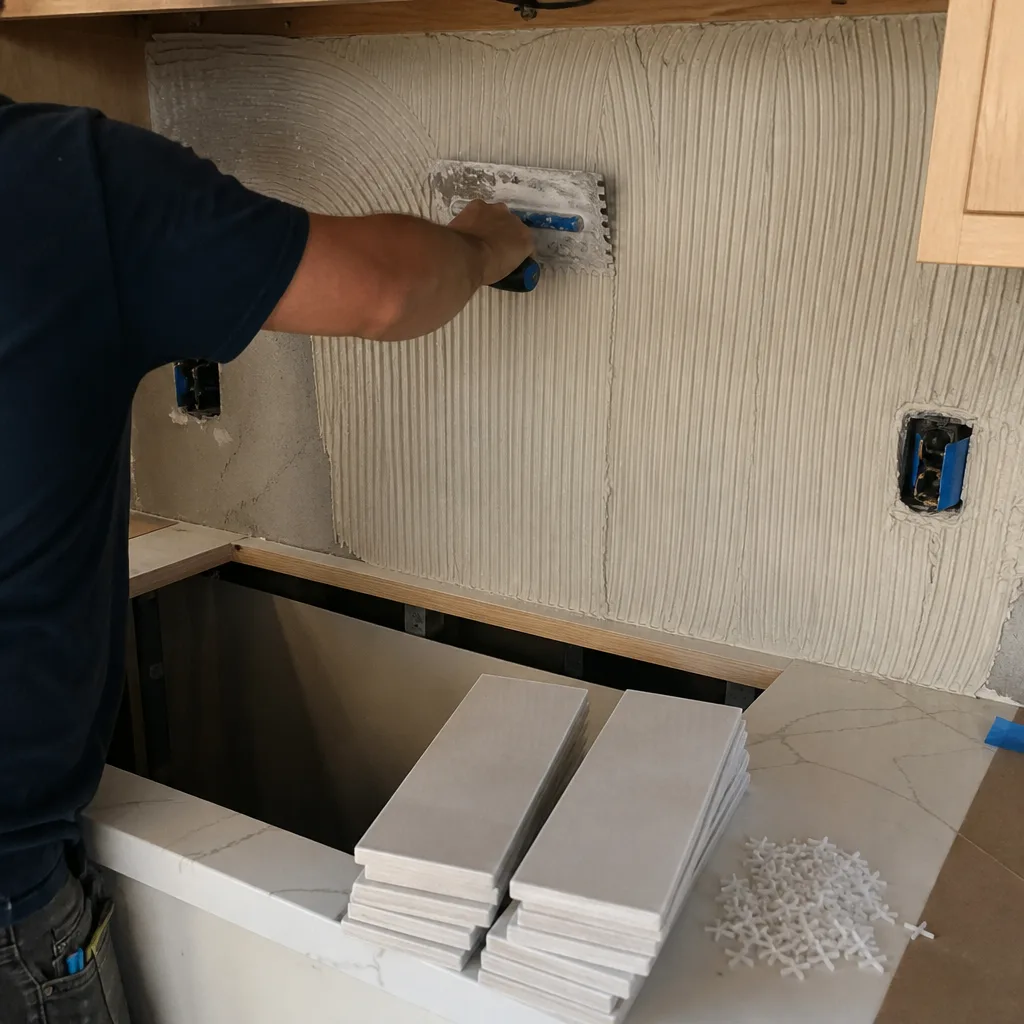
The hidden infrastructure of a kitchen remodel - the supply lines, drain assemblies, and dedicated circuits - receives no visual inspection after closeout unless the homeowner initiates it. Yet these systems account for the majority of insurance claims in the first two years after a kitchen renovation.
Under-Sink Plumbing
The sink base cabinet is the most moisture-stressed location in the kitchen. In Redwood City, where the municipal water supply from the Hetch Hetchy system runs notably soft (low mineral content), we see two distinct failure patterns: compression fittings that loosen slightly as the soft copper supply tubes work under pressure cycling, and P-trap slip joints that weep due to thermal expansion mismatch between PVC and the chrome-plated brass tailpiece.
Monthly check: Remove everything from the sink base. Lay a white paper towel across the cabinet bottom and leave it for 24 hours. Any yellowing or wetness indicates a leak that may be evaporating before it pools visibly. Check the dishwasher drain hose connection to the garbage disposal or air gap; this hose is under pump pressure, not gravity, and the barbed fitting can work loose.
The garbage disposal: Run cold water and the disposal for 15 seconds after grinding stops. This flushes debris past the P-trap. Monthly, grind a handful of ice cubes to scour the grind chamber; the hard particles knock off buildup without damaging the stainless steel impellers.
Electrical: GFCI, AFCI, and Dedicated Circuits
California’s Title 24 energy code requires GFCI protection on all kitchen receptacles and AFCI protection on the branch circuit. These devices have test buttons that should be exercised monthly; the mechanical contacts can seize if left untested.
Circuit mapping: Your remodel’s electrical permit includes a panel schedule, but the homeowner rarely receives a copy. During your 30-day inspection, create your own: turn off each breaker and note which outlets and appliances lose power. Label the panel with a permanent marker. This takes ten minutes and saves hours during any future electrical work or emergency.
Appliance circuits: Electric ranges require a 240V/50A circuit; dishwashers and disposals each require a dedicated 120V/15A or 20A circuit. If your panel is full, the remodel may have required a subpanel or a panel upgrade. Know where this subpanel is and which breakers feed it.
Appliance Integration and Ventilation
Appliances are the homeowner’s responsibility for warranty and service, but their installation affects the surrounding cabinetry and finishes. Poorly integrated appliances cause the callbacks that homeowners mistake for cabinet defects.
Refrigerator
The clearance specified in the installation manual - typically 1/2 inch to 1 inch at sides and top - is not generous; it’s minimum for heat rejection. A refrigerator pushed tight to side panels will run longer, use more energy, and eventually discolor the adjacent cabinet finish from radiant heat. Check the gap with a ruler; if your installer shimmed for a flush look, remove the shims.
Clean the condenser coils every six months. In Redwood City, where eucalyptus and pine pollen are heavy in spring, coils clog faster than the manufacturer’s generic schedule assumes. A coil brush and vacuum attachment take ten minutes.
Range and Cooktop
Gas cooktops require a minimum 30-inch clearance to combustible surfaces above (the bottom of the wall cabinet). We’ve seen homeowners install spice racks or tablet holders that reduce this clearance; it’s a code violation and a fire hazard. Measure from the burner grate surface, not the countertop.
The anti-tip bracket on freestanding ranges is required by code and by manufacturer warranty. Verify it’s engaged by attempting to tip the range forward slightly - it should resist immediately. A range that tips before the bracket engages is unbracketed or improperly installed.
Range Hood and Ventilation
Ventilation rates are specified in cubic feet per minute (CFM). A gas cooktop needs 100 CFM per 10,000 BTU of total burner capacity; an all-electric kitchen needs less. The ductwork from your hood to the exterior should be rigid metal, not flexible duct, and should rise slightly toward the exterior to drain any condensation back toward the hood (where the grease cup catches it), not into the duct where it can pool and rust.
In Redwood City, where winter temperature inversions can trap cooking odors, a properly sized and ducted hood is essential for indoor air quality. If your hood recirculates (ductless), the charcoal filters need replacement every 3-6 months of active use - more often than the manual suggests for average use.
Documenting Your As-Built Remodel

Every Kitchen Remodeling in Redwood City project we complete includes a documented photo record as standard - not an upgrade, not an add-on. The customer receives evidence of what was found and what was done. But the homeowner’s own documentation, created in the first month of occupancy, is equally important for insurance claims, warranty disputes, and future resale.
Create a single digital or physical file with these sections:
- Photographs of shut-off valve locations: The main water shut-off, the sink supply shut-offs, the dishwasher shut-off, and the gas shut-off at the range. Take these with a flash; valves hide in shadows. Label each photo with the date and the direction to turn for off (usually clockwise).
- Circuit breaker panel with labels: Photograph the panel with your handwritten labels visible. Include the main breaker and any subpanel breakers.
- Appliance serial numbers and purchase dates: Record from the rating plate, not the receipt. The rating plate is the manufacturer’s legal identifier; receipts get lost. Include installation dates if different from purchase dates.
- Material specifications: Cabinet manufacturer and door style, countertop material and slab lot number (from the fabricator’s invoice), backsplash tile manufacturer and color number, grout manufacturer and color. These are needed for any repair that must match.
- Warranty documents: Original warranties for cabinets, countertops, appliances, and any contractor workmanship warranty. Rowan Construction Group’s 365-Day Done Right Promise is printed on every page and backed by a terms page, not an asterisk; include your copy.
- Permit and inspection records: The final inspection approval from the City of Redwood City Building Division. This is your proof that the work was inspected and approved, which affects resale value and insurance coverage.
Store this file in cloud storage with offline backup. After a water loss or fire, the original paper may be destroyed; the cloud copy is your evidence for the adjuster. We’ve had Redwood City customers recover full replacement value because they could prove the Calacatta Gold slab was Lot 4478, not a generic “marble countertop.”
Homeowner-Voided Warranty Triggers vs. DIY-Safe Tasks
Manufacturer warranties and contractor workmanship guarantees have different coverage, and both have exclusions that homeowners routinely trigger through well-intentioned maintenance errors.
Tasks That Void Warranties
- Using acidic or abrasive cleaners on quartz or natural stone: Caesarstone’s 10-year residential warranty explicitly excludes “damage caused by improper care or maintenance.” We’ve seen claims denied for etching from vinegar-based cleaners.
- Removing or modifying cabinet hardware mounting: Drilling new holes for pulls or handles in a finished door voids the cabinet manufacturer’s warranty on that door. The original bored holes are machine-precision; hand-drilled holes stress the material differently.
- Self-leveling a dishwasher: If the dishwasher rocks because the floor is uneven, shimming is fine. But adjusting the leveling legs beyond their design range can stress the door seal and the tub-to-frame joint, voiding the appliance warranty.
- Cutting countertop for a new fixture: Any field modification to a quartz, solid surface, or laminate countertop voids the material warranty. Fabrication must be done in a shop with the proper tools and dust collection.
DIY-Safe Tasks
- Hinge and drawer slide adjustment: Designed for homeowner access. Blum and Grass both publish adjustment guides; the screws are accessible with common drivers.
- Caulk replacement at sink and backsplash: Remove old caulk with a plastic scraper, clean with denatured alcohol, apply new silicone or latex caulk, tool with a wet finger. This is routine maintenance, not modification.
- GFCI and AFCI testing: The test and reset buttons are designed for monthly homeowner use.
- Range hood filter cleaning and replacement: Designed for homeowner access; no tools required on most models.
- Refrigerator coil cleaning: Requires only a coil brush and vacuum; no disassembly of sealed components.
The distinction: if the task modifies a sealed system (plumbing pressure boundary, electrical enclosure, countertop surface) or requires a tool not supplied with the product, it’s likely warranty-voiding. If it’s cleaning, adjustment, or filter replacement, it’s typically safe. When uncertain, consult the manual or call the manufacturer - not the retailer’s interpretation, but the manufacturer’s written warranty terms.
Common Mistakes to Avoid

- Waiting for visible damage before inspecting: By the time particleboard swells visibly, it’s structurally compromised. The 30-day and 90-day inspections catch moisture before it shows.
- Using a single cleaner for every surface: The all-purpose spray under the sink is probably acidic or ammoniated. It destroys quartz resin, etches marble, and dulls laminate over time. Read the countertop manufacturer’s care guide and buy the specific cleaner they recommend.
- Ignoring hinge drift as “settling”: A door that no longer self-closes is not settling; it’s a hinge that needs adjustment. Five minutes with a screwdriver prevents the slamming that eventually cracks the door or damages the frame.
- Storing cleaning chemicals in the sink base: Leaks happen. A bottle of drain cleaner that corrodes through its own label will also corrode your cabinet bottom and the shut-off valves. Store chemicals in a garage cabinet or a dedicated laundry room shelf.
- Neglecting the range hood duct: Redwood City homeowners often run the hood on low or not at all, assuming the recirculation is adequate. Grease accumulates in the duct, creating a fire hazard and reducing airflow. Run the hood at appropriate speed for the cooking; clean the duct every 2-3 years if you cook frequently.
- Throwing away the permit documentation: The final inspection card or electronic approval from Redwood City Building Division is your proof of code compliance. Replacement requires a records request and fees. Keep it with your home’s permanent records.
- Assuming the contractor’s warranty covers everything: Workmanship warranties cover installation defects, not wear from use or damage from maintenance errors. The 365-Day Done Right Promise covers our work; it does not cover a homeowner using vinegar on marble. Know which warranty applies to which component.
When to Call a Professional
Some conditions indicate system failure, not maintenance needs. Call a licensed contractor or the appropriate trade specialist if you find: continuous moisture under the sink that recurs within 24 hours of drying (indicates a pressure leak, not a weep); any smell of gas near the range; GFCI outlets that won’t reset or trip repeatedly under normal load; countertop seams that have opened or changed level; cabinet doors that won’t adjust to plane with the full range of hinge adjustment (indicates frame racking or wall movement); or any electrical sparking, buzzing, or warmth at outlets or switches.
For kitchen remodeling work in Redwood City, Rowan Construction Group Redwood City home offers free estimates. Call (650) 560-7228 to schedule. We also provide a Free Second Opinion on any written estimate - bring a competitor’s quote and we will review it line by line at no charge. Under Clause 1 of the Haven Standard, the price is written before anyone starts; under the 365-Day Done Right Promise, if it is not done right, we make it right.
Frequently Asked Questions
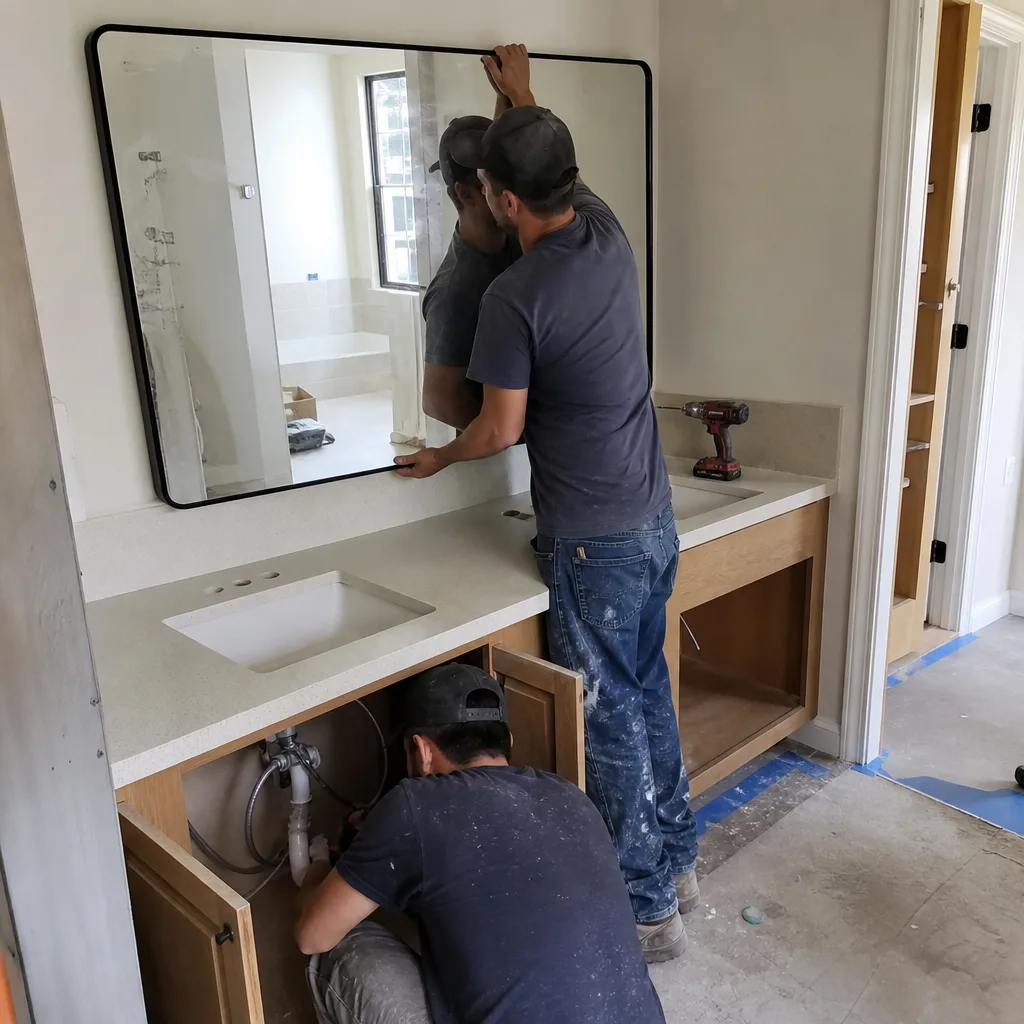
Repair costs typically range from $400 for localized cabinet base replacement to $2,800 if the damage extends to the cabinet box, countertop substrate, and adjacent flooring. Explore more guides & resources for preventive maintenance tips. The critical variable is how long the leak ran before detection. Call (650) 560-7228 for an exact quote - estimates are free.
No. Rowan Construction Group delivers a flat written price with a written scope before any work begins, every time. No change proceeds without a signed change order. This discipline, acquired by Haven and maintained since 2007, has kept projects within a few percent of the agreed cost across 4,000-plus jobs.
Yes. Every kitchen remodeling project that involves plumbing, electrical, or structural modification requires permits from the City of Redwood City Building Division. We pull permits, schedule inspections, and do not close out a project until final inspection is passed. The customer receives documentation of all approvals.
The first maintenance inspection should occur at 30 days, with critical checks at 90 days and 180 days. After the first year, quarterly inspections of high-stress areas (under-sink plumbing, cooktop backsplash grout, hinge alignment) are sufficient. Well-maintained cabinets and countertops last 20-plus years; neglected systems show failure in 3-5 years.
Not special materials, but proper hardware selection. The marine climate’s humidity swings make adjustable hinges essential rather than optional. We specify Blum or Grass hinges with three-axis adjustment on every Redwood City kitchen because we’ve measured the seasonal movement. Frameless European-style cabinets with metal-reinforced mounting plates perform better than face-frame cabinets with wood-only hinge mounts in this environment.
Check your documentation file for the original warranty document and the installation date. Most manufacturer warranties (Caesarstone 10-year residential, Cambria lifetime residential, Wilsonart 10-year) require registration within 30-90 days of installation. They also exclude damage from improper cleaning, heat exposure, and field modifications. If you lack the original warranty, contact the manufacturer with the slab lot number or product code from your invoice.
The Bottom Line
A kitchen remodel represents one of the largest capital investments most Redwood City homeowners make in their property. The work itself - cabinets, countertops, appliances, finishes - is built to last decades. What determines whether it actually does is the maintenance protocol in the first 24 months. The inspections are brief: 20 minutes at 30 days, 30 minutes at 90 days, less thereafter. The documentation takes an hour to assemble and minutes to update annually. The alternative is grout failure, cabinet damage, and plumbing leaks that cost thousands to repair and diminish the value of the original investment. The checklist in this guide is the written protocol that most contractors never provide. Use it, and your kitchen will perform as designed.
For homeowners considering a kitchen remodel or evaluating an existing one, Bathroom Remodeling in Redwood City and Roofing in Redwood City are additional services where the same documentation discipline applies. Rowan Construction Group serves Redwood City with flat written pricing, background-checked uniformed crews, and a documented photo record on every visit - included as standard, not an upgrade.
Written by Grant Rowan, Owner at Rowan Construction Group Redwood City, serving Redwood City since 2007.